Pool Inspection Photos: What to Photograph for Each Safety Feature
BPC §7195(c) asks four things of every HSC §115922(a) safety feature: in place, in good repair, operable as designed, and labeled. Each is a different photograph. The shot list per feature, the measurement in frame, the photo of a feature that is not there, captions, and how the photos end up under each finding in the PDF.
A pool inspection photo has one job: to prove the fact the report states. Business and Professions Code §7195(c) asks four things of each HSC §115922(a) drowning prevention safety feature, whether it is in place, in good repair, operable as designed and, if applicable, appropriately labeled, and each of the four is a different photograph. Presence is a context frame, repair is a close-up, operation is a sequence, and the label is a macro shot with the standard legible.
This guide gives the shot list for each feature and for the suction outlets, the habits that make a photo evidence rather than decoration, what to do about a feature that is not there, how to caption, and how the photos end up under the finding they belong to in the PDF. It assumes the walk in our pool safety inspection checklist.
What each photo has to prove
The four questions in BPC §7195(c) map onto four kinds of photograph, and a feature that is present usually needs all four.
The question
The photograph
Example
In place
A context frame that shows the feature where it stands, with the pool or the house in the same shot
The isolation fence between the patio and the water
In good repair
A close-up of the part that wears: hinges, latch, straps, the alarm unit, the mesh at its posts
The gate latch, rust or none
Operable as designed
A sequence: the gate a few inches open, then latched on its own; the door with the closer; the alarm indicator lit with the door open
Two frames of the same gate
Appropriately labeled
The label filling the frame, with the standard readable
ASTM F1346-23 on the cover tag
The statute does not require the inspector to determine whether a feature meets the ASTM or ASME specification, so the label photo records that the label exists and what it says, and the note says the same, no more.
Height; gap under; widest opening; outside face; each gate three ways; the latch height
Tape from the ground at the lowest point, reading 60 in. or the shortfall; tape under the bottom rail, 2 in. or the gap; tape or a 4 in. sphere at the widest opening; the outside face with no handholds or footholds; the gate a few inches open, then latched; tape from the ground to the latch release, 60 in. or the shortfall
(2) Removable mesh fencing, ASTM F2286
The label; the run; the gate; the lock
The F2286 label filling the frame; the fence installed with every section in place; the gate closing and latching on its own; the key lock
(3) Safety pool cover, ASTM F1346-23
The label; the cover in place; the anchors or straps
The F1346-23 tag legible; the cover over the whole pool; anchors or straps engaged, worn ones close up
(4) Exit alarms
Each door and window with direct access; the unit; the indicator with the opening ajar
The opening from inside the house; the alarm unit on it; the armed indicator lit while the door stands open, with the note recording that it sounded or repeated its warning
(5) Self-closing, self-latching door devices
The closer; the latch; the release height
The closer on the door; the door latched after release from a few inches; tape from the floor to the release, 54 in. or the shortfall
(6) In-water alarm, ASTM F2208
The certification; the unit in the water
The F2208 certification mark legible; the unit installed and armed, with the note recording whether the owner allowed a test
(7) Other means, independently verified
The verification label; the device
The label from the testing laboratory legible; the device where it operates
Two more subjects belong in the file though they are not among the seven features. The suction outlets: each cover, with its markings legible, and the arrangement of outlets on the pool floor and walls, under HSC §115928 and our drain cover guide. And the routes to the water: one frame from inside the house through each door or window with direct pool access, so the report shows what the alarm or the door device is protecting.
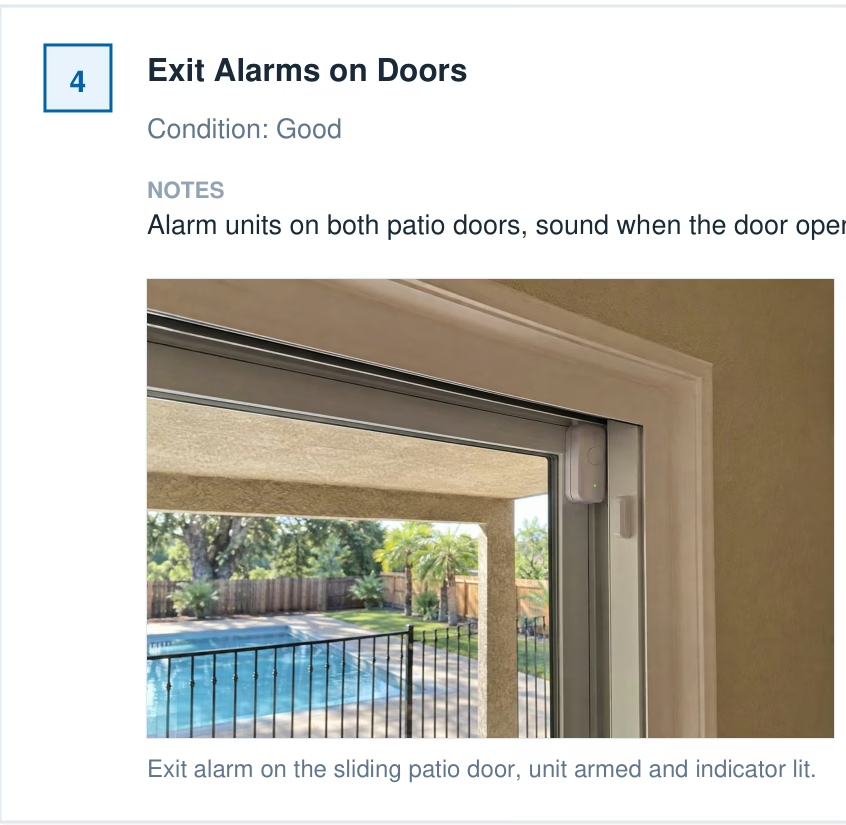
The exit alarm card from page 3 of a PoolVerify report: the alarm unit on the sliding patio door, with the caption printed under the photo.
Four habits that turn a photo into evidence
The number is in the frame, not only in the note. A note that reads latch release at 60 in. is an assertion; the tape from the ground to the release, with 60 visible, is evidence. Hold the tape taut against the surface, shoot square to it, and take the frame again if the reading is not legible on the screen before you move on.
Context, then detail. A close-up of a latch does not say which gate, and a wide shot of a fence does not show the latch. Shoot the wide frame first and the close-up second, so the pair reads in order in the report.
The operation, not the pose. A gate photographed closed proves nothing about self-latching. Release it from a few inches open and photograph it after it has latched on its own; do the same from halfway and from fully open, and photograph the one that fails. Our gate latch guide covers the test.
Same order, every pool. The enclosure clockwise from the house, gates as you reach them, then the house openings, then covers, alarms and outlets. A fixed order means the fifth inspection of the day has the same photo set as the first, and a missing shot is noticed at the pool.
Photographing what is not there
BPC §7195(c) requires the report to identify which of the seven features the pool has, so a feature recorded as not present is a finding with the same weight as a feature recorded as compliant, and it needs the same evidence. Photograph the place where the feature would be and caption it as the absence it documents: the patio door with no alarm and no closer, the pool with no cover on a day it should be covered, the enclosure line with no mesh fence, the water with no alarm in it.
The same habit covers an item that could not be tested. An in-water alarm the owner would not let you trigger is photographed installed, captioned as not tested with the reason, and recorded in the report as not tested rather than as operable. Our liability guide explains why the untested item, recorded honestly, is the safer line for the four years BPC §7199 allows a claim.
The photo lives on the item, not in the camera roll. In PoolVerify each California checklist item accepts up to 10 photos with captions, taken or uploaded on the phone or tablet at the pool and compressed for a slow connection. The PDF prints them under the finding they document, two to a row, with the captions. See the checklist.
Captions and organization
A caption states what the photo shows, where it is, and the number or label it proves, in one line: gate latch release measured at 60 in. above the ground, east gate; ASTM F1346-23 label on the cover, north edge; sliding patio door, no exit alarm or closing device fitted. Written at the pool, it goes under the photo in the report; written from memory at the laptop that evening, it is the caption that names the wrong gate.
Organization follows from where the photo is stored. A camera roll sorts by time, so the fence, the gate and the door from the same pool sit among photos of the previous pool, and every one has to be matched to a finding later. A checklist that stores the photo on the item it documents has no matching step: the fence photos are on the fence item, the alarm photos on the alarm item, and the PDF prints each set under its own card.
Part of the job
Phone camera roll and Word
PoolVerify
Where the photo goes
The roll, sorted by time
The checklist item it documents, up to 10 per item
Captions
Typed into the document at night, from memory
Typed at the pool, printed under the photo in the PDF
Matching photos to findings
By hand, after the inspection
None; the item is the finding
The report
Assembled in Word, exported, signed, scanned
Generated in seconds with the photos in two-column frames under each card, signed on the device
Retention
The phone and the laptop
Stored with the inspection, 256-bit encryption, backed up
The sample report shows the result: the fence item on page 2 with three captioned photos, the exit alarm and door device items on page 3 with one each, and the deck finding on page 5 with a coin for scale. Our report example guide walks the whole document page by page.
Limitations
This guide is general information about California law, not legal advice. The current text of BPC §7195, HSC §115922 and HSC §115923 on leginfo.legislature.ca.gov controls, and an inspector's association may set its own photo standards. A photograph records what was visible on the day; it does not determine whether a feature meets an ASTM or ASME standard, and neither does the inspector under BPC §7195. PoolVerify is inspection software for California residential pool safety inspections; it has no offline mode, so photos upload as you work over a connection, and it does not perform inspections, certify inspectors, or issue compliance certificates.
Frequently asked questions
How many photos should a pool inspection report have?
Enough that every status in the report has a photograph behind it: at least one context frame of the pool and the house, one photo with the measurement in frame for each measured item, one of the operation for each gate, door and alarm, one of each label, and one of each feature that is not present. PoolVerify allows up to 10 photos per checklist item, each with a caption.
Should I photograph a safety feature that is not present?
Yes. BPC §7195(c) requires the report to identify which of the seven features the pool has, so a feature recorded as not present needs the same evidence as one recorded as compliant. Photograph the place where it would be, such as the patio door without an alarm or the pool without a cover, and caption it as the absence it documents.
Do I need the tape measure in the photo?
For any number the report states, yes. A note that says the latch release is 60 inches above the ground is an assertion; a photo of the tape from the ground to the release is evidence. HSC §115923 gives the enclosure numbers, 60 inches high, 2 inches under, no 4 inch sphere, latch release no lower than 60 inches, and HSC §115922(a)(5) gives 54 inches for a door release.
Should photos of pool safety features include people?
No. The photograph documents the feature, the measurement or the label, and a person in frame adds nothing the report needs while raising a privacy question with the client. Photograph the tape, the latch, the label and the opening; if someone must hold the tape, frame the shot so only the hand and the tape appear.
What should a photo caption say?
What the photo shows, where it is, and the number or label it proves: for example, gate latch release measured at 60 in. above the ground, east gate. A caption written at the pool, attached to the checklist item, is printed under the photo in the PDF; a caption written from memory at night is the one that gets the wrong gate.
How does PoolVerify handle inspection photos?
Each checklist item accepts up to 10 photos taken or uploaded on the phone or tablet, compressed on upload for a slow on-site connection, each with a caption. The PDF prints the photos under the item they document, in two-column frames with the captions, and the inspection, its photos and the signed report are stored with 256-bit encryption for as long as the account keeps them.
Conclusion
Every status in a pool inspection report needs a photograph behind it, and the four questions in BPC §7195(c) say which: the feature in place, the wearing part close up, the operation in sequence, and the label legible, with the tape in frame wherever the report states a number and a captioned photo of the absence wherever a feature is not there.
PoolVerify keeps each photo on the checklist item it proves, captioned at the pool, and prints it under the finding in a PDF generated on-site. Start your 14-day free trial, no credit card to start.
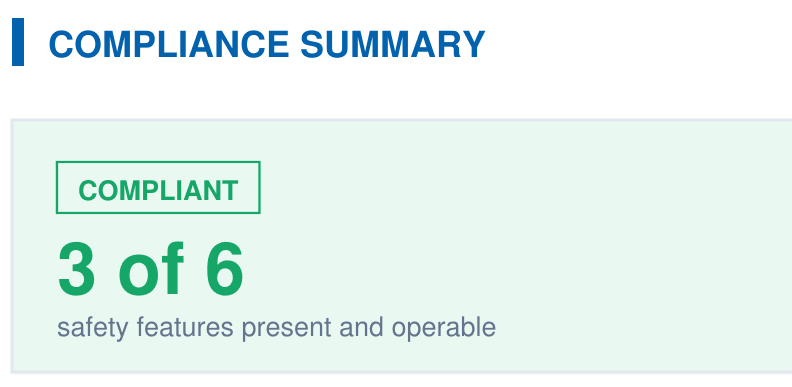
A branded PDF with the compliance summary, the feature table, each finding with its photos, and the signature, generated on‑site when the BPC §7195 and HSC §115922 checklist is complete.